shatterpoint assembly instructions
Shatterpoint assembly offers a Star Wars miniature experience. While generally intuitive, complex models may require guides. Online resources and community forums provide detailed support for smooth assembly processes.
Overview of Shatterpoint Miniatures
Shatterpoint miniatures bring the Star Wars universe to life with highly detailed and durable models. Designed for both novice and experienced hobbyists, these miniatures require assembly to unlock their full potential. Each model is crafted from high-quality plastic, ensuring longevity and stability. While some users find the assembly process intuitive, others, especially newcomers, may need guidance. The miniatures often feature intricate designs, particularly for characters and vehicles, making proper assembly crucial for their appearance and functionality. Online resources, such as assembly diagrams and community forums, provide extensive support for those seeking help. With patience and the right tools, Shatterpoint miniatures offer a rewarding experience for fans and tabletop enthusiasts alike.
Importance of Proper Assembly Techniques
Proper assembly techniques are crucial for ensuring the durability and visual appeal of Shatterpoint miniatures. Incorrect alignment or excessive glue can damage components, while poor fitting may lead to instability. By following precise methods, hobbyists can achieve secure bonds and maintain intricate details. Proper techniques also enhance the longevity of models, preventing wear and tear during handling or transport. Additionally, accurate assembly ensures that miniatures function well in gameplay, preserving their aesthetic and functional integrity. Investing time in mastering these skills not only elevates the quality of the final product but also enriches the overall Star Wars: Shatterpoint gaming experience for enthusiasts and collectors alike.
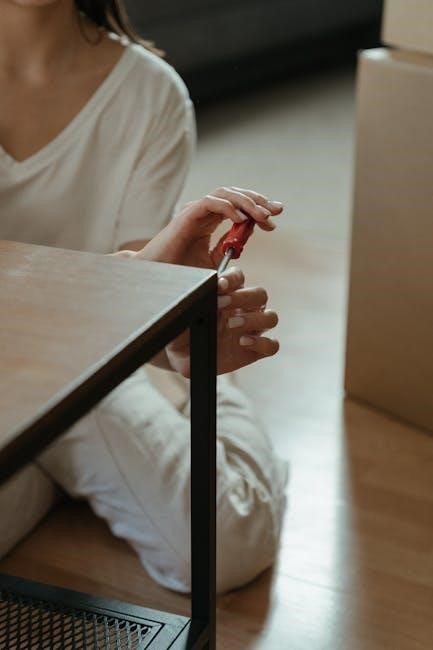
Preparation for Assembly
Begin by carefully unboxing and inventorying all components to ensure no parts are missing. Organize pieces and prepare your workspace with essential tools and materials for efficiency.
Unboxing and Inventory of Components
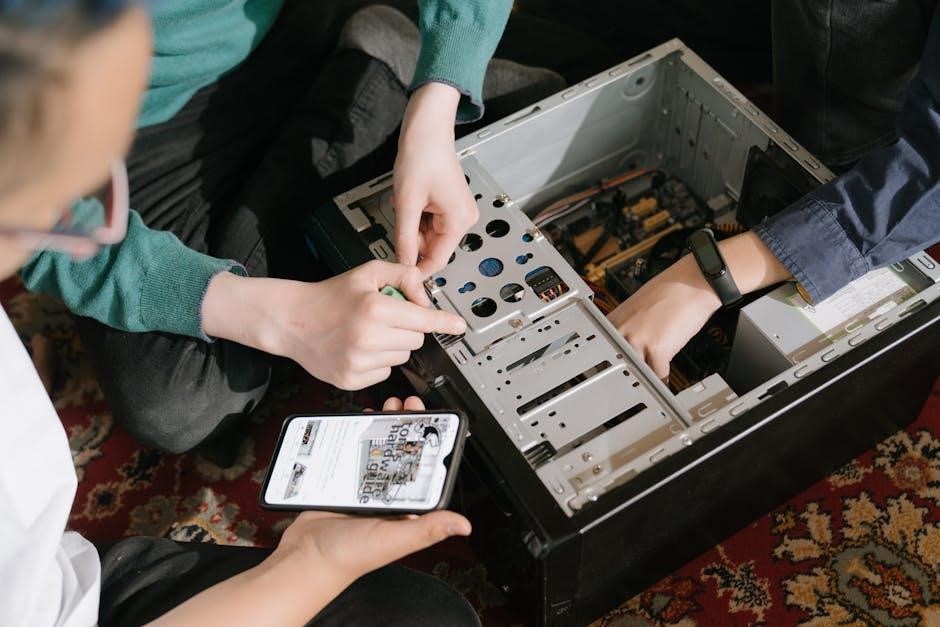
Begin by carefully unboxing your Shatterpoint miniatures to ensure all parts are accounted for. Check the contents against the provided list or online documentation to confirm completeness. Organize the components by type or model, using small containers or bags for tiny pieces to prevent loss. Examine each part for any visible damage or defects; This step is crucial for a smooth assembly process, as missing or damaged components can delay progress. Take your time to sort and categorize items, ensuring everything is ready for the next stages of preparation and assembly. Proper organization will save time and reduce frustration during the building process.
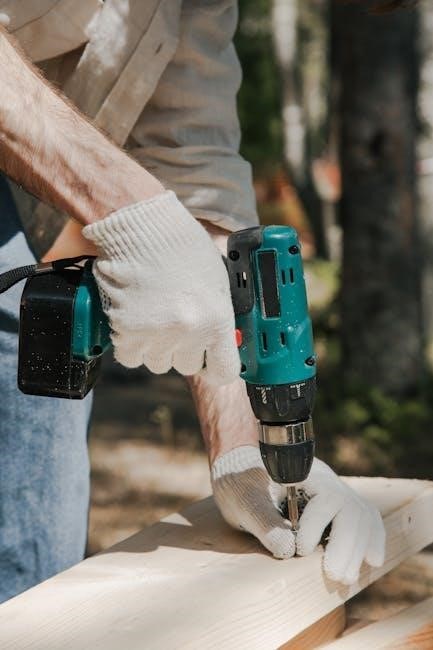
Tools and Materials Needed for Assembly
The essential tools for assembling Shatterpoint miniatures include hobby clippers for removing parts from sprues, files to smooth rough edges, and plastic glue for bonding components. A hobby knife can help with precise trimming, while paint and brushes are optional for customization. Materials like pinning rods may be needed for added stability in complex models. Ensure a clean, well-lit workspace with a cutting mat or protective surface. Referencing online assembly guides or diagrams can also aid in understanding part orientation. Always use caution with adhesives and sharp tools, and work in a well-ventilated area. Organizing your tools and materials beforehand will streamline the assembly process and enhance your overall experience.
Workspace Setup for Efficient Assembly
A well-organized workspace is crucial for efficient Shatterpoint assembly. Start by clearing a clean, flat surface and ensure proper lighting to avoid eye strain. Place a cutting mat or protective cover to prevent damage to your work area. Organize components and tools in labeled containers or trays for easy access. Keep reference materials, such as assembly guides or online diagrams, within reach to minimize confusion. A ventilated area is recommended when using adhesives or paints. Finally, assemble parts in a logical sequence, starting with the largest components and progressing to smaller details. A structured workspace enhances focus and ensures a smoother assembly process for your Shatterpoint miniatures.
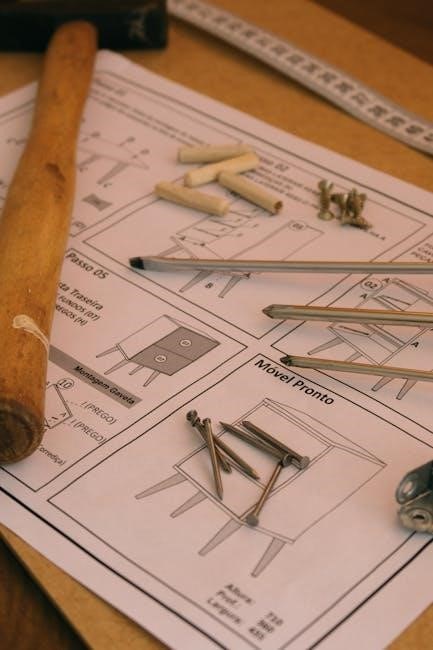
Understanding Assembly Diagrams
Understanding assembly diagrams is essential for accurate Shatterpoint model construction. They provide visual guides, part references, and step-by-step instructions, ensuring components fit together seamlessly.
Locating Official Assembly Guides
Official Shatterpoint assembly guides are readily available on the Atomic Mass Games website and through their mobile app. These resources provide detailed diagrams and instructions for each miniature, ensuring accuracy. Additionally, many guides are accessible via QR codes found in the packaging, offering a convenient way to access step-by-step instructions. For complex models, video tutorials and community forums often supplement the official guides, offering visual and interactive support. Manufacturers also provide customer support teams to address specific assembly queries. By utilizing these official and community resources, hobbyists can navigate even the most intricate builds with confidence and precision.
Interpreting Diagrams for Complex Models
Interpreting assembly diagrams for complex Shatterpoint models requires careful attention to detail. Start by examining the official guides provided by Atomic Mass Games, which often include color-coded parts and step-by-step visuals. Look for symbols or labels that indicate specific connections or orientations. For intricate components, zoom in on the diagrams to identify small notches or alignment markers. Use online resources, such as community forums or video tutorials, to cross-reference and clarify confusing sections. Pay attention to the sequence of assembly, as some parts may require pre-assembly before fitting into the main model. If unsure, assemble in stages, checking each piece against the diagram before proceeding. This method ensures accuracy and minimizes the risk of misalignment or damage. Always verify the fit of parts before applying glue to avoid permanent mistakes.
Using Online Resources for Visual Guidance
For visual guidance, online resources are invaluable for assembling Shatterpoint miniatures. Atomic Mass Games provides official assembly guides on their website and YouTube channel, offering step-by-step tutorials. Community forums and social media groups dedicated to Shatterpoint often share fan-created guides and tips. Video tutorials on platforms like YouTube and Twitch can provide real-time demonstrations of complex builds. Additionally, forums such as Reddit or Facebook groups allow hobbyists to ask questions and share their experiences. Use search terms like “Shatterpoint assembly tutorial” or “how to assemble [specific model]” to find relevant content. These resources help clarify assembly steps and provide alternative methods for challenging parts. Always cross-reference with official guides to ensure accuracy and avoid errors.
General Assembly Instructions
Start by unboxing and inventorying components. Prepare parts by removing from sprues carefully. Align pieces according to diagrams, ensuring proper fit. Apply glue sparingly, allowing time to dry.
Preparing Parts for Assembly
Begin by carefully removing miniatures from sprues using a hobby knife or clippers. Clean excess plastic and mold lines with a file or sandpaper. Inspect each part for fit, ensuring proper alignment before gluing. Use a small tool to remove any debris from joints or notches. For intricate pieces, consider soaking sprues in warm water to prevent breaking. Dry all components thoroughly to ensure adhesive effectiveness. Organize parts by referencing assembly diagrams to streamline the process. Handle small or delicate components with tweezers to avoid loss or damage. Sand rough edges lightly to enhance smooth assembly and prevent scratching. Patience in preparation ensures a seamless and durable final build.
Aligning and Fitting Components
Begin by test-fitting parts to ensure proper alignment before applying glue. Use tweezers for small components to avoid mishandling. Apply a minimal amount of plastic glue to avoid excess, which can damage details. Allow glue to set slightly before handling to prevent shifting. For delicate parts, use a small clamp or hold firmly for a few seconds. If parts don’t fit perfectly, gently file or sand edges to achieve a seamless connection. Avoid forcing pieces, as this can break the plastic. Use assembly diagrams to identify correct orientation and placement. Proper alignment ensures stability and a professional finish. Handle intricate parts with care to maintain their structural integrity during assembly.
Applying Adhesive for Secure Bonds
Applying the right amount of adhesive is crucial for secure bonds. Use hobby plastic glue, as it fuses pieces together without damaging details. Always test-fit components before gluing to ensure proper alignment. Apply a small amount of glue to one part and gently press the components together. Avoid excess glue, as it can spill onto unwanted areas. Use a brush to spread glue evenly for better coverage. For small parts, apply glue sparingly to prevent overflow. Allow the glue to set slightly before handling to avoid misalignment. If excess gluesqueeze out, wipe it away with a damp cloth immediately. Let the assembly dry completely before handling to ensure strength. Refer to assembly diagrams for specific adhesive application points. Patience ensures a sturdy and professional finish.
Model-Specific Assembly Tips
Assembling Shatterpoint miniatures requires model-specific techniques. Droids need careful handling of small parts, while troopers benefit from precise armor alignment. Vehicles may demand multi-step assembly processes.
Assembling Droid Miniatures
Assembling Shatterpoint droid miniatures requires precision and care due to their intricate designs. Start by carefully examining the components and ensuring all parts fit together properly before gluing. Use a small amount of hobby plastic glue to secure the pieces, as excess adhesive can damage the model. Pay special attention to small details like joints and panels, ensuring they align correctly. For complex droids, refer to official assembly diagrams or online tutorials for guidance. Handle delicate parts with tweezers to avoid breakage. Allow the glue to fully dry before handling the completed model. Patience and attention to detail are key to achieving a professional finish.
Building Trooper Figures
Building Shatterpoint trooper figures involves careful attention to detail and proper alignment of parts. Start by examining the components and ensuring all pieces fit together smoothly before applying glue. Use hobby clippers to remove parts from the sprue, and gently sand any rough edges. Align the body, arms, and accessories precisely, as troopers often have specific poses or gear. Apply a small amount of plastic glue to secure the joints, avoiding excess that could spill onto details. For models with poseable arms or additional gear, ensure each part is properly aligned before the glue sets. Use tweezers for handling small accessories like weapons or helmets.
Allow the glue to dry completely before handling the figure. If necessary, use touch-up paint to blend any seams or imperfections. Trooper figures often have intricate armor and gear, so patience and attention to detail are essential for a polished result.
Constructing Vehicle Models
Constructing Shatterpoint vehicle models requires precision and patience, especially for intricate designs. Begin by carefully removing parts from the sprue and cleaning any mold lines or excess plastic. Use plastic glue to assemble the chassis and main body first, ensuring proper alignment. For wheels or turrets, attach them last to avoid misalignment during handling. Small components like cockpit details or weapons should be handled with tweezers to prevent loss or damage. Apply glue sparingly to avoid seepage onto visible areas. Allow each section to dry completely before moving on to the next. Refer to assembly diagrams for specific part placement, and use online guides for visual confirmation. Touch-up paint can be used to blend seams or correct minor imperfections, ensuring a professional finish.
Advanced Assembly Techniques
Advanced techniques involve precision tools and methods for complex models, such as pinning for stability or enhancing joints for durability, ensuring professional-grade results.
Using Pinning for Added Stability
Pinning is an advanced technique to enhance model stability, especially for heavy or jointed components. By drilling small holes in both parts and inserting a metal pin, you create a secure bond. Start with a thin drill bit to avoid damaging the plastic. Use a pinning drill bit for precision and ensure the pin fits snugly. Apply a small amount of super glue to the pin before inserting it. This method is ideal for large weapons, limbs, or vehicles. For delicate parts, use a pin vice to maintain control. Regularly clean the drill bit to prevent residue buildup. This technique ensures durability and prevents parts from becoming loose over time.
Enhancing Joints for Better Durability
Enhancing joints is crucial for ensuring long-term durability of your Shatterpoint miniatures. Start by cleaning the joint areas thoroughly with a hobby knife or file to remove excess plastic. Test-fit the components to ensure proper alignment before applying glue. For added strength, use a small amount of plastic cement and let it dry completely. For particularly fragile joints, consider reinforcing with a pin or a dab of modeling putty. This technique is especially effective for movable parts like arms or legs. Regularly inspect and touch up joints during assembly to prevent weak points. Proper joint enhancement ensures your miniatures withstand handling and remain stable over time.
Handling Small and Delicate Parts
Handling small and delicate parts requires precision and care to avoid damage or misalignment. Use a pair of fine-tipped tweezers or a small hobby tool to grip tiny components without touching them excessively, as oils from your skin can interfere with glue adhesion. Work in a well-lit area to ensure visibility. When removing parts from the sprue, cut carefully along the edges to prevent breaking. Test-fit parts before gluing to ensure proper alignment. Apply a small amount of plastic glue and let it dry completely to secure the part. For extremely fragile pieces, consider using a pin or a small dab of putty for added stability. Practice patience, as handling delicate parts is a skill that improves with experience.
Troubleshooting Common Issues
Common assembly issues include misaligned parts, excess glue, and damaged components. Check part fit before gluing, use minimal adhesive, and have spare parts on hand for repairs.
Fixing Misaligned Parts
Misaligned parts can be frustrating but are often fixable. Start by carefully examining the fit of each component before applying glue. If a part is already glued but misaligned, gently pry it apart and reposition it. For minor adjustments, use a small file or sandpaper to smooth rough edges or reshape notches. Plastic glue can sometimes be softened with nail polish remover to allow repositioning. If the misalignment is severe, consider starting over with a new part. Online resources and community forums often provide tips for correcting common alignment issues. Patience and careful handling are key to achieving a precise fit. Proper tools and techniques ensure durable, professional-looking results.
Dealing with Excess Glue
Excess glue can be a common issue during assembly, potentially causing parts to stick together unintentionally or creating unsightly messes. To address this, apply glue sparingly and use a precision applicator for better control. If excess glue dries, carefully scrape it off with a hobby knife or fine file, taking care not to damage the surrounding area. For stubborn spots, a solvent like nail polish remover can soften the glue for easier removal. Regularly cleaning your tools and workspace can also help prevent glue from spreading uncontrollably. Acting quickly to wipe away excess with a damp cloth before it hardens is another effective strategy. Proper cleanup ensures a cleaner, more professional-looking model.
Repairing Damaged Components
Repairing damaged components requires patience and precision. Start by carefully cleaning the affected area to remove dirt or debris. For broken parts, apply a small amount of plastic glue to the broken edges and align them precisely. If the damage is extensive, consider reinforcing the area with a pin or a small metal rod for added stability. For gaps or misaligned joints, use a hobby file to smooth out the surfaces before reattaching. In cases where glue has caused unintended bonding, gently pry the parts apart with a hobby knife or use a solvent to soften the adhesive. Always test the fit of repaired components before final assembly to ensure proper alignment and functionality. Regular maintenance and careful handling can prevent future damage to your miniatures.
Post-Assembly Care and Maintenance
Properly clean and handle assembled models gently to prevent wear. Use mild soap solutions and avoid harsh chemicals. Store miniatures in protective cases to maintain condition and prevent damage.
Cleaning and Handling Assembled Models
Cleaning and handling assembled Shatterpoint miniatures requires care to maintain their condition. Use a soft, dry brush to gently remove dust or debris from intricate details. For more thorough cleaning, lightly dampen a soft cloth with water or a mild soap solution, avoiding harsh chemicals. Gently wipe the surfaces, ensuring no moisture seeps into joints or small crevices. Allow the model to air dry completely before handling or storing. Handle assembled models by the base or sturdy sections to prevent accidental damage. Avoid touching painted areas to minimize oil transfer from fingertips. Regular cleaning and careful handling will preserve the miniatures’ appearance and durability for long-term enjoyment.
Storing Miniatures Properly
Proper storage is essential to protect Shatterpoint miniatures from damage and maintain their condition. Use hard plastic cases or magnetic trays with foam inserts to keep models secure and prevent movement. Store each miniature individually to avoid chipping or breaking. Keep the storage container in a cool, dry place away from direct sunlight to prevent warping or fading. Avoid stacking models directly on top of each other, especially if they have delicate parts. For additional protection, consider using silica gel packets to absorb moisture and reduce humidity. Organize the storage container by model type or size for easy access. Proper storage ensures your Shatterpoint miniatures remain in pristine condition for years of enjoyment and gameplay.
Transporting Assembled Models Safely
Transporting assembled Shatterpoint miniatures requires careful planning to prevent damage. Use hard-shell cases with foam inserts or individual compartments to protect each model. Avoid stacking models directly on top of one another, especially if they have fragile or protruding parts. For added security, wrap delicate components in soft padding or bubble wrap. When traveling, keep the case in a stable, upright position and avoid exposure to extreme temperatures or humidity. Consider using sealable plastic bags for small parts to prevent loss. Always handle the transport case with care, as sudden impacts can damage the miniatures. By ensuring safe transportation, you can preserve the integrity and appearance of your Shatterpoint models for future use and display.
Additional Resources and Support
Official guides, community forums, and video tutorials provide comprehensive support for Shatterpoint assembly, ensuring access to detailed instructions and expert advice for a successful build.
Finding Official Assembly Instructions
Official assembly instructions for Shatterpoint miniatures are typically available on the manufacturer’s website or through their official support channels. Many users have reported success by visiting the Atomic Mass Games website, where detailed guides and diagrams are provided. Additionally, some product boxes include QR codes or links directing users to online resources. Community forums and video tutorials often supplement these instructions, offering visual guidance for complex builds. Ensuring access to these resources before starting assembly can significantly streamline the process and improve results. Always verify the source of instructions to ensure accuracy and compatibility with your specific Shatterpoint models.
Community Forums for Assembly Help
Community forums are invaluable for Shatterpoint assembly assistance, offering peer-to-peer support and shared expertise. Platforms like Reddit and Facebook host dedicated groups where enthusiasts discuss builds, share tips, and troubleshoot issues. Many users highlight the Shatterpoint Subreddit and Facebook groups as go-to resources for visual guides and step-by-step advice. These communities often include veteran builders who provide insights and solutions for challenging models. Additionally, some forums feature user-created tutorials and galleries showcasing completed miniatures for inspiration. Engaging with these communities can enhance your assembly experience and help you refine your skills. Active participation in these forums ensures access to a wealth of knowledge and real-time assistance.
Video Tutorials for Complex Builds
Video tutorials are an excellent resource for mastering complex Shatterpoint assemblies. Channels like YouTube offer detailed guides, such as those from Rich Mid Gaming and Fabricator General, which provide step-by-step instructions. These videos often focus on challenging models, offering tips for aligning parts and managing small components. Many creators share real-time assembly processes, allowing viewers to pause and follow along. Tutorials also cover troubleshooting common issues, like misaligned parts or excess glue. They frequently include close-ups and alternative assembly methods, ensuring viewers understand intricate details. These videos are particularly helpful for beginners, offering a visual learning experience that complements written guides. By leveraging these resources, builders can confidently tackle even the most intricate Shatterpoint miniatures with precision and success.