
moentrol shower valve installation instructions
Install a Moentrol shower valve for enhanced showering experiences. Known for durability and precise temperature control‚ this guide provides a comprehensive walkthrough to ensure a smooth installation process.
1.1 Overview of Moentrol Shower Valves
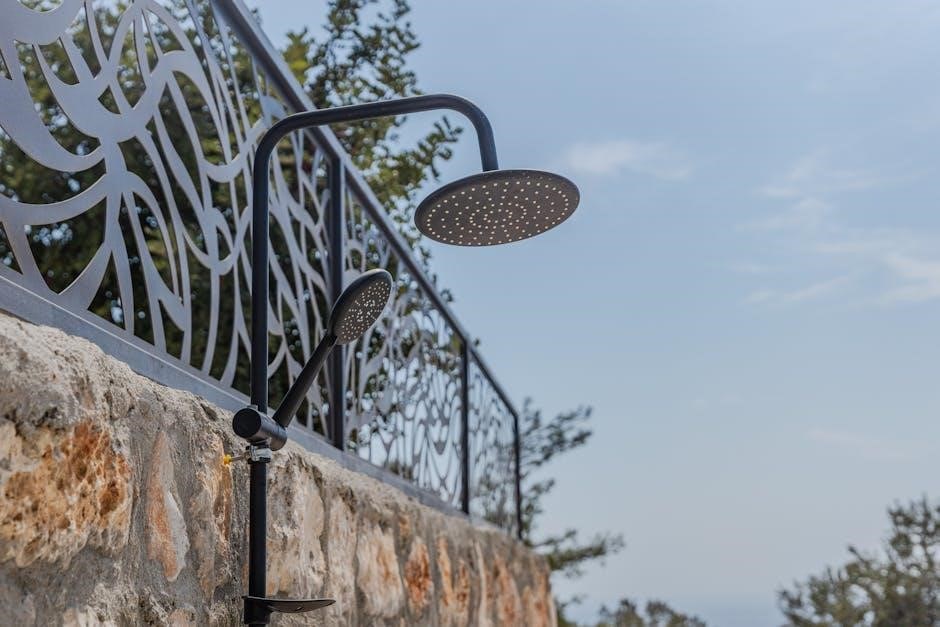
Moentrol shower valves are renowned for their exceptional performance‚ durability‚ and sleek design. Designed to provide precise temperature control and smooth operation‚ these valves are a popular choice for modern bathrooms. Featuring advanced pressure-balancing technology‚ they ensure consistent water temperature‚ even when other fixtures are in use. Available in a variety of styles and finishes‚ Moentrol valves seamlessly integrate with any bathroom aesthetic. Constructed from high-quality materials like brass‚ they offer long-lasting reliability and resistance to corrosion. Their intuitive design makes them easy to install and maintain‚ while their advanced features enhance user comfort and safety. Moentrol valves are a trusted solution for homeowners seeking both functionality and elegance.
1.2 Importance of Proper Installation
Proper installation of a Moentrol shower valve is crucial for ensuring safety‚ optimal performance‚ and longevity. Incorrect installation can lead to leaks‚ water damage‚ or uneven temperature control‚ compromising user safety. A well-installed valve ensures smooth operation‚ precise temperature adjustment‚ and minimal risk of mechanical failure. Adhering to the manufacturer’s guidelines guarantees compliance with safety standards and preserves the product warranty. Additionally‚ proper installation prevents costly repairs and enhances the overall showering experience. By following the recommended steps and using the right tools‚ homeowners can enjoy a reliable‚ efficient‚ and stylish shower system for years to come. Proper installation is an investment in both safety and satisfaction.
1.3 Brief History of Moentrol and Its Reputation
Moentrol‚ a trusted name in plumbing fixtures‚ has built a reputation for quality‚ innovation‚ and reliability. Founded with a commitment to precision engineering‚ Moentrol has become synonymous with durable‚ high-performance shower valves. Known for their sleek designs and advanced features‚ Moentrol products are preferred by professionals and homeowners alike. The brand’s focus on safety‚ water efficiency‚ and user comfort has solidified its position in the market. Over the years‚ Moentrol has consistently delivered shower valves that combine modern aesthetics with exceptional functionality‚ making them a top choice for those seeking long-lasting‚ trouble-free performance. Their reputation for excellence ensures peace of mind for every installation.

Tools and Materials Required
Essential tools include an adjustable wrench‚ pliers‚ screwdriver‚ and Teflon tape. Materials needed are the Moentrol valve‚ mounting hardware‚ and plumbing connectors for secure installation.
2.1 Essential Tools for the Job
Install a Moentrol shower valve with the right tools. Essential items include an adjustable wrench for tightening connections‚ pliers for gripping small parts‚ a screwdriver for handle installation‚ Teflon tape to prevent leaks‚ and a bucket to catch water during drainage. Additional tools like a drill‚ Allen wrench‚ and plunger may be needed for specific situations. Ensure all tools are readily available to streamline the process and avoid delays. Proper tools ensure a secure and leak-free installation‚ making the job safer and more efficient. Always refer to the manufacturer’s instructions for any specialized tools that may be required for your specific model.
2.2 Materials Needed for Installation
Ensure you have all necessary materials for a smooth Moentrol shower valve installation. Required items include the Moentrol valve itself‚ plumbing connectors (e.g.‚ copper or PEX lines)‚ and mounting hardware like screws and washers. Teflon tape or pipe dope is essential for creating leak-proof connections. If not included‚ purchase a handle or trim kit to complete the installation. Additional materials may include a water filter‚ check valves‚ or adapters to match your existing plumbing system. Verify compatibility with your specific Moentrol model and local plumbing codes before starting. Having all materials ready ensures efficiency and avoids mid-installation delays.
2.3 Optional Accessories for Enhanced Functionality
Enhance your Moentrol shower valve installation with optional accessories for improved performance and convenience. Consider adding a digital temperature controller for precise temperature adjustments or a flow-rate regulator to conserve water. A rainfall showerhead or additional body sprays can elevate your showering experience. Anti-scald devices are recommended for families with children or pets to prevent accidental burns. LED indicators can provide visual feedback on water temperature. If integrating smart home features‚ invest in compatible controllers. These accessories not only personalize your setup but also ensure optimal functionality and safety. Choose based on your specific needs and preferences to maximize the benefits of your Moentrol shower valve system.

Pre-Installation Preparation
Begin by shutting off water supply and draining the system. Protect surrounding areas with drop cloths or plastic sheets to prevent damage. Gather tools and materials nearby.
3.1 Shutting Off the Water Supply
Before starting the installation‚ locate and shut off the main water supply valves. These are typically found near the water heater or where the main water line enters the house. Turn the valves clockwise until they stop to ensure the water supply is completely shut off. Open the shower faucet to drain the remaining water from the pipes. This step is crucial to prevent water from flowing out during installation‚ which could lead to flooding or damage. Double-check that the water supply is off by turning the shower handle to the “on” position; no water should flow. Proceed only when the system is fully drained.
3.2 Draining the System
After shutting off the water supply‚ open the shower faucet to allow any remaining water in the pipes to drain completely. Place a bucket or container beneath the faucet to catch any residual water. This step ensures that no water flows out during the installation process‚ reducing the risk of mess or damage. Allow the water to drain fully before proceeding. If there is significant water left in the system‚ it may take a few minutes for it to empty entirely. Once the water has stopped dripping‚ you can safely begin the installation. This prevents water from spilling out during the process.
3.4 Protecting the Surrounding Area
Before starting the installation‚ protect the surrounding area from water damage and debris. Cover the floor and walls with drop cloths or plastic sheets to prevent splashes and spills. Use tape to secure the coverings in place‚ ensuring they remain intact throughout the process. Additionally‚ remove any decorative items or toiletries from the shower area to avoid accidental damage. This step is crucial to maintain cleanliness and prevent costly repairs. By taking the time to protect the space‚ you can focus on the installation without worrying about mess or damage to your bathroom fixtures and surfaces.
Step-by-Step Installation Guide
This guide provides a detailed‚ easy-to-follow process for installing a Moentrol shower valve‚ covering preparation‚ removal of the old valve‚ and proper installation of the new one.
4.1 Removing the Old Valve (If Applicable)
Begin by shutting off the water supply to prevent any leaks. Disconnect the plumbing lines from the old valve‚ using a bucket to catch residual water. Remove any screws or clips securing the valve to the wall or plumbing. Gently pull the old valve out of its mounting bracket‚ taking care not to damage surrounding fixtures or pipes. If the valve is stuck‚ use a wrench or pliers to carefully loosen it. Once removed‚ inspect the area for any debris or mineral buildup and clean it thoroughly before proceeding with the new installation.
4.2 Accessing the Shower Valve Location
Before installing the Moentrol shower valve‚ locate the existing valve. In most cases‚ it is behind the shower handle or faucet. Turn off the water supply beforehand to ensure safety. Remove any decorative covers or handles to access the valve. If the valve is located behind tiles or a wall‚ you may need to cut a small access panel or remove surrounding materials. Once accessible‚ inspect the valve’s position to confirm compatibility with the Moentrol system. Take note of the plumbing layout to ensure proper alignment during installation. If unsure‚ consult a professional or refer to the manufacturer’s guidelines for precise location identification.
4.3 Mounting the Moentrol Shower Valve
To mount the Moentrol shower valve‚ begin by preparing the area‚ ensuring it is clean and free of debris. Attach the mounting bracket provided with the valve‚ using screws or adhesive as specified in the instructions; Align the valve with the bracket‚ ensuring proper positioning for optimal function and to prevent leaks. Secure the valve by tightening the screws or bolts gently but firmly to avoid damaging the threads. Use Teflon tape or pipe dope on plumbing connections to ensure watertight seals. Refer to the manufacturer’s guidelines for specific torque recommendations or materials. Exercise caution by placing buckets or towels to catch any residual water. After mounting‚ test the valve by turning on the water supply and checking for leaks. Proceed to install the handle and trim once the valve is confirmed to be working correctly.
4.4 Connecting the Plumbing Lines
After mounting the valve‚ connect the plumbing lines carefully. Apply Teflon tape to the valve’s threaded connections to ensure watertight seals. Attach the hot and cold water lines to the valve’s inlets‚ tightening securely with an adjustable wrench. Next‚ connect the outlet to the showerhead or diverter valve‚ ensuring proper alignment. Double-check all connections for tightness to prevent leaks. Turn the water supply back on slowly to avoid sudden pressure spikes. Inspect all connections for leaks by gently running water through the system. If any leaks are detected‚ tighten the connections slightly and test again. Properly connected plumbing ensures smooth operation and longevity of the Moentrol shower valve.
4.5 Installing the Handle and Trim
Once the valve is mounted and plumbing lines are connected‚ install the handle and trim. Start by aligning the handle with the valve stem‚ ensuring proper orientation. Gently push the handle onto the stem and secure it using the provided screw. Tighten the screw with an Allen wrench‚ being careful not to overtighten. Next‚ attach the trim kit around the valve‚ ensuring it is centered and evenly spaced. Secure the trim with the screws provided‚ tightening them evenly to avoid unevenness. Finally‚ test the handle to ensure smooth operation and proper water control. Proper installation of the handle and trim completes the valve setup‚ providing both functionality and aesthetic appeal.
4.6 Testing the Valve for Leaks
After completing the installation‚ turn the water supply back on and inspect the valve for leaks. Start by turning the water supply valves clockwise to restore water flow. Check all connections‚ including the plumbing lines‚ handle‚ and trim‚ for any signs of moisture or drips. Use a dry cloth to wipe away any water droplets and observe for a few minutes. If leaks are detected‚ tighten the connections or replace any worn-out gaskets. Test the valve by running water through it and adjusting the temperature to ensure proper function. A leak-free installation ensures optimal performance and longevity of the Moentrol shower valve.
Advanced Features and Customization
Moentrol shower valves offer advanced features like temperature limit settings and flow rate adjustments. Customize your shower experience with optional handle styles and finishes for a personalized look.
5.1 Setting the Temperature Limit
Setting the temperature limit on your Moentrol shower valve ensures safe and consistent water temperatures. Locate the temperature limit stop on the valve cartridge. Use an Allen wrench to adjust the stop by rotating it clockwise to lower the maximum temperature or counterclockwise to increase it. Be cautious not to set the temperature too high to avoid scalding. After adjusting‚ replace any covers or handles you removed. Test the water temperature to ensure it meets your desired setting; This feature is especially useful for households with young children or elderly members to prevent accidental burns. Proper adjustment ensures both safety and comfort during use.
5.2 Adjusting the Flow Rate
Adjusting the flow rate on your Moentrol shower valve allows you to customize the water flow to your preference. To do this‚ locate the flow control handle or knob‚ typically found on the valve. Turn the handle counterclockwise to increase the flow rate or clockwise to decrease it. For finer adjustments‚ some models may have an adjustment screw behind the handle. Be careful not to overtighten‚ as this could damage the valve. After adjusting‚ test the water flow to ensure it meets your needs. Proper flow rate adjustment can enhance your showering experience while also helping to conserve water. This feature is particularly useful for balancing pressure and efficiency in various plumbing setups.
5.3 Integrating with Smart Home Systems
Integrating your Moentrol shower valve with smart home systems enhances convenience and control. Many modern Moentrol models are compatible with smart home systems like Zigbee‚ Z-Wave‚ or Wi-Fi-enabled hubs. To integrate‚ connect the valve to your smart home hub according to the manufacturer’s instructions. Once connected‚ you can control the shower valve via a smartphone app or voice commands through platforms like Alexa or Google Home. This allows you to start the shower‚ adjust temperature‚ or turn it off remotely. Some systems also support scheduling and energy monitoring. Ensure your Moentrol valve is compatible with your smart home system before installation for seamless integration and enhanced functionality.
Common Issues and Troubleshooting
Identify and address common issues promptly to ensure optimal performance. Always troubleshoot early to prevent minor problems from becoming major issues‚ ensuring your shower system’s efficiency and longevity.
6.1 Leaks and How to Fix Them
Leaks are a common issue that can arise after Moentrol shower valve installation. They often occur due to improper connections or worn-out seals. To fix leaks‚ first locate the source—commonly around handles‚ cartridges‚ or plumbing connections. Turn off the water supply before attempting repairs. Inspect and tighten any loose connections using an adjustable wrench. Replace worn-out O-rings or washers with genuine Moentrol parts. Apply a small amount of plumber’s grease to new seals for a watertight fit. If leaks persist‚ consider replacing the entire cartridge or valve assembly. Regular maintenance can prevent future leaks‚ ensuring long-term performance and satisfaction.
6.2 Low Water Pressure Solutions
Low water pressure in your shower can be frustrating‚ but there are effective solutions to address this issue. First‚ check for clogs in the showerhead or valve. Clean or replace the showerhead if mineral buildup or debris is present. If the Moentrol valve is installed incorrectly‚ reposition it to ensure proper alignment with plumbing lines. Additionally‚ inspect the valve cartridge for dirt or debris‚ as this can restrict water flow. For optimal performance‚ ensure the valve is set to the correct flow rate during installation. If issues persist‚ consider consulting a professional plumber to assess your home’s water pressure system and recommend upgrades or adjustments.
6.3 Handling Mineral Buildup
Mineral buildup can hinder the performance of your Moentrol shower valve over time. To address this‚ regularly clean the valve and cartridge using a soft cloth and vinegar solution. Hard water or mineral-heavy water can cause deposits to accumulate‚ so frequent maintenance is essential. For severe buildup‚ remove the cartridge and soak it in a mixture of vinegar and water for several hours. Use a toothbrush to gently scrub away stubborn deposits. After cleaning‚ rinse thoroughly and reinstall the cartridge. To prevent future buildup‚ consider installing a water filter or flushing the system annually. Regular inspection and cleaning will ensure optimal performance and extend the valve’s lifespan.

Maintenance and Upkeep
Regular maintenance ensures the longevity of your Moentrol shower valve. Clean handle surfaces‚ inspect for wear‚ and replace worn-out parts promptly to maintain optimal functionality and performance.
7.1 Regular Cleaning Tips
Regular cleaning is essential to maintain the functionality and appearance of your Moentrol shower valve. Use a soft‚ dry cloth to wipe down the valve handle and trim regularly. For tougher stains or mineral buildup‚ mix a mild soap solution with warm water and gently scrub with a non-abrasive sponge. Avoid using harsh chemicals‚ abrasive cleaners‚ or scrubbers‚ as they may damage the finish. For stubborn spots‚ soak a clean cloth in a vinegar solution and apply it to the area before rinsing thoroughly. Always dry the valve after cleaning to prevent water spots. Regular maintenance ensures a polished look and smooth operation over time.
7.2 Inspecting for Wear and Tear
Regularly inspect your Moentrol shower valve to identify and address wear and tear early. Check the handle for looseness or difficulty in operation‚ as this may indicate worn internal components. Inspect O-rings‚ gaskets‚ and seals for signs of cracking‚ drying‚ or mineral buildup‚ which can lead to leaks. Look for corrosion on metal parts‚ especially in areas exposed to water. Ensure all plumbing connections are secure and free from damage. Inspect the valve cartridge for proper alignment and function. Perform these checks every 6-12 months or when you notice a change in performance. Addressing issues promptly prevents costly repairs and ensures optimal functionality. Regular inspections help maintain the valve’s longevity and reliability.
7.3 Replacing Parts When Necessary
Replacing worn or damaged parts of your Moentrol shower valve is essential for maintaining its performance and longevity. Common parts that may need replacement include O-rings‚ gaskets‚ and the valve cartridge. If you notice leaks‚ inconsistent water temperature‚ or difficulty in adjusting the handle‚ inspect these components. Turn off the water supply before starting any replacement. Use genuine Moentrol replacement parts to ensure compatibility and quality. Follow the manufacturer’s instructions for disassembling the valve and installing the new part. After replacement‚ test the valve to ensure proper function. Addressing worn parts promptly prevents further damage and ensures your shower remains safe and efficient. Regular part replacement is a cost-effective way to maintain your Moentrol shower valve’s reliability and performance over time.
Installing Moentrol shower valves offers lasting benefits‚ ensuring optimal performance and satisfaction. Proper maintenance and care will extend the lifespan of your shower system.
8.1 Recap of Key Installation Steps
Successfully installing a Moentrol shower valve involves several critical steps. Begin by shutting off the water supply and draining the system to prevent water damage. Protect the surrounding area with a drop cloth or plastic sheeting. If replacing an old valve‚ carefully remove it and prepare the space. Mount the new Moentrol valve securely‚ ensuring proper alignment. Connect the plumbing lines according to the manufacturer’s instructions‚ double-checking for leaks. Install the handle and trim‚ making sure they fit snugly. Finally‚ test the valve thoroughly to ensure proper function and leak-free performance. Following these steps ensures a professional-grade installation.
8.2 Benefits of Using Moentrol Shower Valves
Moentrol shower valves offer exceptional durability‚ ensuring long-term reliability and performance. Their precise temperature control provides a luxurious showering experience‚ while advanced flow rate adjustment enhances water efficiency. Designed with sleek‚ modern aesthetics‚ these valves elevate bathroom decor. Additionally‚ Moentrol valves are constructed with high-quality materials‚ resisting corrosion and mineral buildup. They are also easy to maintain‚ reducing long-term care hassles. With optional smart home integration‚ users can enjoy cutting-edge functionality. Overall‚ Moentrol shower valves combine style‚ functionality‚ and durability‚ making them a superior choice for homeowners seeking a premium showering solution.
8.3 Final Tips for Long-Term Satisfaction
To ensure long-term satisfaction with your Moentrol shower valve‚ perform regular maintenance‚ such as cleaning and inspecting for wear. Replace worn-out parts promptly to prevent leaks or performance issues. Descale the valve periodically to remove mineral buildup‚ especially in hard water areas. Always follow the manufacturer’s guidelines for temperature and flow rate adjustments. Avoid using abrasive cleaners‚ as they may damage the finish. Store the valve handle gently to prevent excessive wear on internal components. By following these tips‚ you can enjoy a durable‚ high-performing Moentrol shower valve for years to come‚ providing a luxurious and reliable showering experience.