honeywell t6 wifi install manual
Honeywell T6 Wi-Fi Install Manual: A Comprehensive Guide
This manual details the installation of the Honeywell T6 Pro Wi-Fi thermostat, covering everything from unboxing to Wi-Fi connectivity and advanced settings․
It includes information on the UWP mounting system, compatibility checks, and troubleshooting steps for a seamless installation experience․
The Honeywell T6 Pro Smart Thermostat (model TH6220WF2006) represents a significant advancement in home climate control, seamlessly blending intelligent functionality with user-friendly operation․ This Wi-Fi enabled thermostat allows for remote access and management of your home’s heating and cooling systems via the Honeywell Home app, available on both iOS and Android platforms․
Designed for ease of installation and compatibility with a wide range of HVAC systems, the T6 Pro offers programmable scheduling, geofencing capabilities, and smart alerts to optimize energy efficiency and comfort․ The included UWP (Universal Wireless Platform) mounting system simplifies the installation process, even for those with limited experience․
Beyond basic temperature control, the T6 Pro provides detailed energy usage reports, enabling homeowners to identify areas for potential savings․ Access to advanced features, including Installer Setup (ISU) mode, allows professionals to fine-tune system configurations for optimal performance․ This guide will walk you through each step, ensuring a successful and efficient installation of your Honeywell T6 Pro․
Unboxing and Package Contents
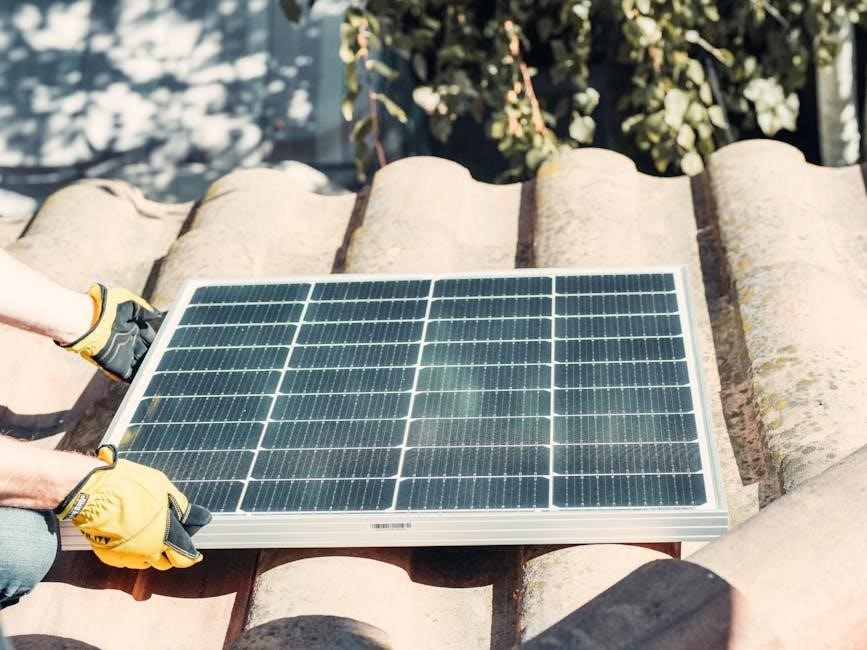
Upon opening the Honeywell T6 Pro Wi-Fi Thermostat package, carefully verify that all components are present and undamaged․ The standard package includes the T6 PRO Wi-Fi Thermostat unit itself, the core of your new climate control system․ You’ll also find the UWP Mounting System, designed for simplified installation on most walls․
A Honeywell Standard Installation Adapter (J-box adapter) is provided to ensure compatibility with existing wiring configurations․ A Honeywell Decorative Cover Plate, sized at 4-49/64 inches (121mm), is included to provide a clean, finished look․ Essential screws and anchors are also present for secure mounting․
Finally, a Professional Install Guide is included, offering detailed instructions for HVAC professionals․ It’s crucial to check for all these items before proceeding with the installation․ Missing components should be reported to the retailer immediately․ Retain the packaging for potential warranty claims or returns․
Understanding the UWP Mounting System
The Universal Wall Plate (UWP) Mounting System is a key feature of the Honeywell T6 Pro, designed to simplify installation and ensure compatibility with a wide range of wall types and existing wiring setups․ This system separates the thermostat base from the wall plate, allowing for easier wiring and leveling․
The UWP consists of a backplate that securely mounts to the wall, and a thermostat body that then easily snaps onto the backplate․ This modular design accommodates various mounting scenarios, including those requiring a J-box adapter․ The system’s design minimizes the need for extensive wall modifications․
Setting slider tabs within the UWP are crucial for configuring the system to match your specific heating and cooling setup․ These tabs, detailed later in this guide, determine how the thermostat interacts with your HVAC system․ Proper UWP installation and configuration are fundamental to the successful operation of your Honeywell T6 Pro thermostat․
Thermostat Compatibility and System Requirements
Ensuring compatibility is vital before installing the Honeywell T6 Pro․ This thermostat is generally compatible with most 24V heating and cooling systems, including forced air, heat pump, and radiant heat․ However, it’s not compatible with line voltage systems (110V/220V) or systems requiring a C-wire without using a compatible C-wire adapter․
Key system requirements include a common (C) wire, or the use of a compatible add-a-wire/C-wire adapter․ The T6 Pro supports single-stage, multi-stage, and heat pump systems․ Verify your existing wiring configuration against the thermostat’s wiring diagram before proceeding․
Crucially, confirm the model number – specifically, look for a “WF” designation (e․g․, TH6220WF2006) to ensure Wi-Fi capability․ If the model lacks “WF”, it won’t connect to your home network․ A thorough compatibility check prevents installation issues and ensures optimal performance of your new Honeywell thermostat․
Pre-Installation Checklist
Before beginning the installation, a comprehensive checklist ensures a smooth process․ First, turn off power to your HVAC system at the breaker box to avoid electrical shock – this is critical․ Second, verify compatibility with your system (see the ‘Thermostat Compatibility’ section)․ Third, gather necessary tools: a screwdriver, wire strippers, a level, and potentially a C-wire adapter․
Fourth, carefully document your existing wiring configuration by taking a clear photograph or creating a detailed diagram․ This is invaluable for re-connecting wires correctly․ Fifth, download the Honeywell Home app to your smartphone or tablet and create an account, or log in if you already have one․
Finally, ensure a stable Wi-Fi connection is available near the thermostat location․ Having these items prepared beforehand minimizes delays and potential complications during the installation process, leading to a successful setup of your Honeywell T6 Pro․
Safety Precautions
Prioritizing safety is paramount during the Honeywell T6 Pro installation․ Always disconnect power to your HVAC system at the circuit breaker before commencing any wiring work․ Failure to do so presents a serious risk of electrical shock․ Never attempt installation if you are uncomfortable working with electrical wiring; consult a qualified HVAC professional․
Exercise caution when handling tools, ensuring they are in good working order and used correctly․ Avoid working in damp or wet conditions․ Be mindful of the thermostat’s location, ensuring it’s mounted securely and doesn’t obstruct walkways or create a tripping hazard․
Properly dispose of any packaging materials and old thermostat components responsibly․ Keep small parts, such as screws, away from children․ Read and understand all instructions thoroughly before beginning the installation process․ Adhering to these precautions will help ensure a safe and successful installation of your new thermostat․
Wiring the Honeywell T6 Pro
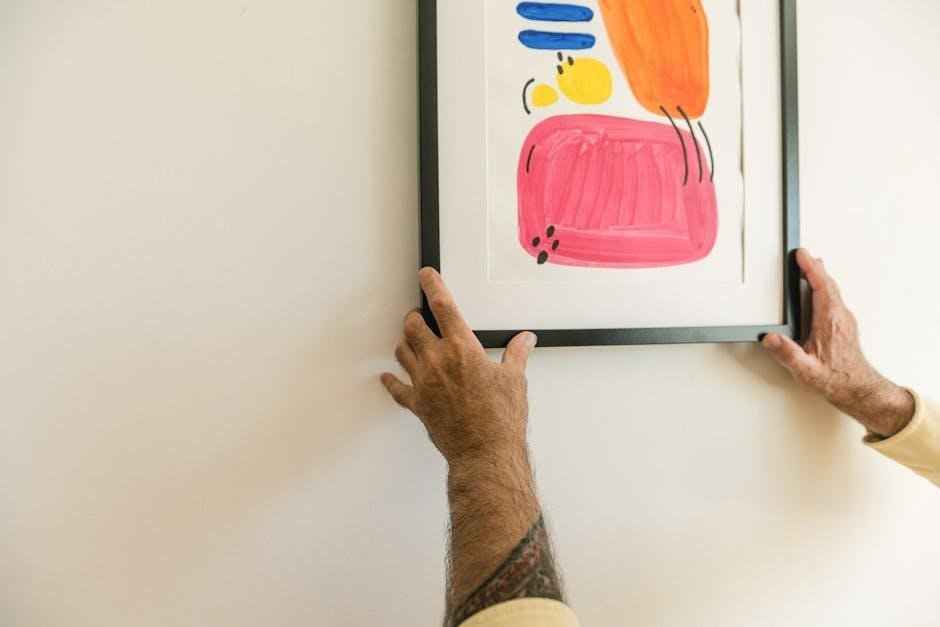
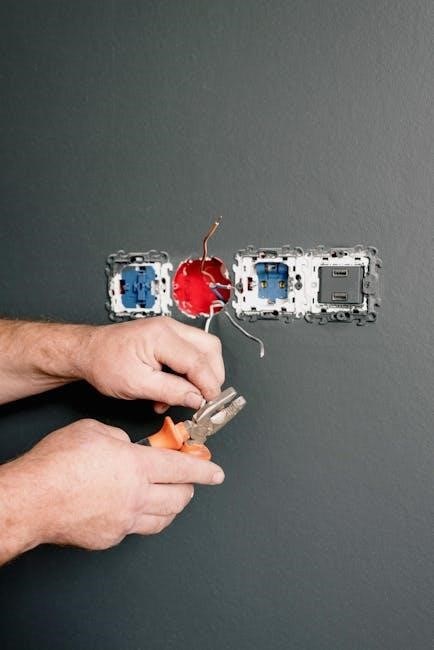
Before wiring, ensure power is OFF at the breaker! Carefully remove your old thermostat, labeling each wire as you disconnect it․ The Honeywell T6 Pro utilizes a standard wiring configuration, but variations exist․ Refer to the terminal designations (detailed in the next section) to correctly connect each wire to the corresponding terminal on the T6 Pro’s backplate․
Common terminals include Rh (heating power), Rc (cooling power), W (heat), Y (cool), G (fan), and C (common – required for Wi-Fi functionality)․ If a C-wire isn’t present, a compatibility check or the use of a C-wire adapter may be necessary․ Securely connect each wire to its designated terminal, ensuring a firm connection․
Double-check all connections against your existing wiring labels and the Honeywell wiring diagram․ Incorrect wiring can damage your HVAC system or the thermostat․ Once all wires are connected, carefully mount the T6 Pro backplate to the wall, ensuring it’s level and secure․
Terminal Designations Explained
Understanding the terminal designations is crucial for correct wiring․ Rh provides power to the heating system, while Rc powers the cooling system․ These may be shorted together with a jumper if your system uses a single transformer․ W activates the heating system, Y controls cooling, and G operates the fan․
The C-terminal (Common) is essential for consistent power and reliable Wi-Fi connectivity; without it, the thermostat may not function correctly․ Aux/E is for auxiliary or emergency heat, and O/B reverses the heat pump valve for heating or cooling․ L is for fault indication․
Carefully identify each wire from your old thermostat and match it to the corresponding terminal on the Honeywell T6 Pro․ Incorrect connections can lead to system malfunction․ Refer to your HVAC system’s wiring diagram if unsure․ Always double-check your work before restoring power․
Setting Slider Tabs (UWP System)
The Universal Wireless Platform (UWP) mounting system utilizes slider tabs for tailored system configuration․ These tabs, located on the backplate, dictate how the thermostat interacts with your HVAC system․ Proper setting is vital for accurate operation․
The ‘U’ slider tab is particularly important, configuring system type – heat pump, forced air, or hydronic․ Position ‘1’ typically suits conventional systems, while other positions accommodate heat pumps with varying configurations․ Carefully consult your system’s wiring diagram to determine the correct setting․
Additional sliders manage features like fan control and auxiliary heat․ Incorrect slider positions can cause the system to operate improperly or not at all․ Ensure all sliders are firmly set in their chosen positions before mounting the thermostat․ Refer to the detailed diagrams included with the UWP system for precise guidance․
Ventilation System Configurations
The Honeywell T6 Pro accommodates diverse ventilation system setups, requiring careful configuration via the UWP slider tabs and the thermostat’s menu․ Understanding your system type is crucial for optimal performance․ Common configurations include forced air, heat pump, and hydronic systems, each demanding specific settings․
For systems with a dedicated ventilator, the thermostat can be programmed to control its operation․ This often involves assigning a specific input terminal to the ventilator and configuring the schedule within the Honeywell Home app․ Ensure compatibility between the ventilator and the T6 Pro before proceeding․
Proper ventilation control enhances indoor air quality and energy efficiency․ Incorrect settings can lead to inadequate ventilation or unnecessary energy consumption․ Consult the thermostat’s advanced menu for detailed ventilation options and refer to your HVAC system’s documentation for specific recommendations․ Always prioritize safety and follow local building codes․
Using the U Slider Tab for System Setup
The ‘U’ slider tab on the UWP mounting system is pivotal for configuring your Honeywell T6 Pro to match your specific heating and cooling system․ This tab dictates crucial settings like heat pump type, fan control, and system voltage․ Incorrect settings can lead to improper operation and potential system damage․
Carefully examine your HVAC system’s wiring and documentation before adjusting the ‘U’ slider․ Common settings include ‘O/B’ for heat pump reversing valve control, ‘Fan On/Auto’ for continuous or automatic fan operation, and voltage selection for compatibility․ Refer to the installation guide for a detailed explanation of each setting․
After adjusting the ‘U’ slider, double-check your selections before proceeding․ Incorrectly configured settings may require removing the thermostat from the wall to readjust the slider․ The Honeywell Home app provides further customization options after the initial setup is complete, allowing for fine-tuning of your system’s performance․
Powering On and Initial Setup
Once the Honeywell T6 Pro is securely mounted and wired correctly, it’s time to power it on and begin the initial setup process․ The thermostat should automatically power on upon establishing a connection to your HVAC system’s power source․ If it doesn’t, double-check the wiring and ensure the power is switched on at the breaker․
Upon powering on, the thermostat will guide you through a series of prompts to configure basic settings․ These include selecting your language, setting the date and time, and choosing your preferred temperature units (Fahrenheit or Celsius)․ Follow the on-screen instructions carefully to ensure accurate configuration․
The thermostat will then prompt you to connect to your home’s Wi-Fi network․ This step is crucial for enabling remote control and access to advanced features through the Honeywell Home app․ Ensure you have your Wi-Fi password readily available before proceeding․ Successful Wi-Fi connection unlocks the full potential of your smart thermostat․
Connecting to Wi-Fi: Step-by-Step
To connect your Honeywell Home TH6220WF2006 PRO T6 to Wi-Fi, begin by downloading the Honeywell Home app from the App Store or Google Play․ Open the app and either create a new account or log in if you already have one․ The app will guide you through adding a new device to your system․
If the thermostat doesn’t automatically enter Wi-Fi setup mode, try holding the temperature button – some users report this initiates the process․ Alternatively, navigate to the device info within the thermostat’s menu and confirm the model number includes “WF”․ If it doesn’t, temporarily remove the thermostat from the wall and reconnect it before trying again․
Within the Honeywell Home app, select “Add a Device” and follow the on-screen prompts․ The app will search for your thermostat and guide you through selecting your Wi-Fi network and entering your password․ Ensure a strong Wi-Fi signal for a stable connection․ Once connected, the app will finalize the setup․
Using the Honeywell Home App
The Honeywell Home app is central to controlling and customizing your T6 Pro thermostat․ After successfully connecting to Wi-Fi, the app provides remote access to your home’s temperature settings from anywhere․ You can create custom schedules, adjusting temperatures based on your daily routine for optimal comfort and energy savings․
The app’s interface allows for easy adjustments to heating and cooling modes, fan settings, and system operation․ Explore the app’s features to set geofencing, which automatically adjusts the temperature based on your location․ Receive alerts regarding extreme temperatures or system malfunctions․
Beyond basic control, the Honeywell Home app enables detailed reporting on energy usage, helping you identify areas for improvement․ Manage multiple thermostats from a single account, ideal for larger homes or vacation properties․ Regular app updates ensure you have access to the latest features and security enhancements․
Account Creation and Device Addition
Before controlling your Honeywell T6 Pro via the app, you must create a Honeywell Home account․ Download the Honeywell Home app from either the App Store (iOS) or Google Play Store (Android)․ Launch the app and select the option to create a new account, providing a valid email address and creating a secure password․
Follow the on-screen prompts to verify your email address and complete the account setup process․ Once logged in, the app will guide you through adding a new device – your T6 Pro thermostat․ Ensure your thermostat is powered on and in pairing mode, typically initiated by holding a specific button as detailed in the installation guide․
The app will search for nearby devices․ Select your T6 Pro from the list when it appears․ You may be prompted to enter your Wi-Fi network credentials to connect the thermostat to your home network․ Follow the app’s instructions carefully to finalize the device addition and begin remote control․
Installer Setup (ISU) Mode
The Installer Setup (ISU) mode unlocks advanced configuration options for the Honeywell T6 Pro, primarily intended for professional installers but accessible to knowledgeable users․ To enter ISU mode, simultaneously press and hold the CENTER and DOWN buttons on the thermostat for approximately three seconds․ This will bring up the advanced menu on the display․
Use the SELECT button to navigate through the ISU menu options․ Within ISU, you can customize various settings, including system type, fan control, temperature limits, and swing adjustments․ Carefully review each option before making changes, as incorrect settings can affect system performance․
The ISU mode allows for precise tailoring of the thermostat to specific heating and cooling systems․ Remember to exit ISU mode once all desired configurations are complete․ Refer to the full installation manual for a detailed explanation of each ISU menu option and its impact on system operation․
Accessing the Advanced Menu
The Advanced Menu on the Honeywell T6 Pro thermostat provides access to a range of settings beyond basic temperature control, enabling customization for specific system configurations․ Accessing this menu is crucial for installers and users seeking to fine-tune their thermostat’s operation․ To enter the Advanced Menu, a specific button combination must be employed․
Press and hold both the CENTER and DOWN buttons simultaneously for approximately three seconds․ The thermostat display will transition, indicating entry into the Advanced Menu․ Within this menu, you’ll find options for system setup, Wi-Fi configuration, device information, and factory reset;
Navigating the Advanced Menu is done using the SELECT button to cycle through options and the UP/DOWN buttons to adjust settings․ Exercise caution when modifying settings, as incorrect adjustments can impact system functionality․ Always consult the full installation manual for detailed explanations of each option before making changes․
Navigating ISU Menu Options
The Installer Setup (ISU) menu within the Honeywell T6 Pro offers specialized settings for professional installers, allowing for precise system configuration․ Accessing ISU, as previously detailed, requires entering the Advanced Menu and selecting the ISU option․ Once inside, a series of setup options become available․
Use the SELECT button to cycle through the ISU menu options․ These typically include settings for heating and cooling stages, fan control, temperature scales, and system type․ The UP and DOWN buttons adjust the values within each setting․ Pay close attention to the displayed parameters and ensure they align with the specific HVAC system being installed․
Common ISU options include configuring the thermostat for single-stage or multi-stage heating/cooling, setting temperature offsets, and defining the operation mode for each stage․ Proper configuration within the ISU menu is vital for optimal system performance and energy efficiency․ Refer to the HVAC system’s documentation for recommended settings․
Key Features and Customization
The Honeywell T6 Pro boasts several key features designed for comfort and energy savings․ Smart scheduling allows users to create customized heating and cooling schedules tailored to their lifestyle, optimizing energy use․ Geofencing utilizes location services to automatically adjust the temperature based on proximity to home, enhancing convenience and efficiency․
Customization options extend beyond scheduling․ The Honeywell Home app enables remote control of the thermostat from anywhere with an internet connection․ Users can monitor energy usage, receive alerts for system issues, and adjust settings on the fly․ Display settings, including brightness and screen timeout, can be personalized for optimal viewing․
Advanced features, accessible through the ISU menu, allow for fine-tuning of system parameters․ Integration with other smart home platforms, such as Amazon Alexa and Google Assistant, provides voice control capabilities․ Regular software updates ensure the thermostat remains current with the latest features and security enhancements․

Troubleshooting Wi-Fi Connection Issues
If your Honeywell T6 Pro fails to connect to Wi-Fi, several troubleshooting steps can be taken․ First, verify the router is functioning correctly and broadcasting a 2․4 GHz network – the thermostat doesn’t support 5 GHz․ Ensure the Wi-Fi password entered is accurate, paying attention to capitalization․ Restarting both the thermostat and the router can often resolve temporary connectivity problems․
If issues persist, check the thermostat’s model number within the device info menu to confirm it includes “WF”․ Try removing the thermostat from the wall for a minute, then reconnecting it to initiate a fresh connection attempt․ Confirm the Honeywell Home app is updated to the latest version, as updates often include bug fixes․
For continued difficulties, resetting the thermostat to factory defaults (refer to the ‘Resetting the Thermostat’ section) can clear any corrupted settings․ Finally, consult the Honeywell Home support website or contact customer service for further assistance, providing the model number and a detailed description of the problem․
Resetting the Thermostat to Factory Defaults
Resetting your Honeywell T6 Pro to factory defaults will erase all personalized settings, including Wi-Fi credentials and scheduling preferences, returning the thermostat to its original out-of-box state․ This is useful when troubleshooting persistent issues or preparing the device for a new user․
To initiate a reset, navigate to the advanced menu on the thermostat․ Press and hold the CENTER and DOWN buttons simultaneously for approximately three seconds․ This will access the advanced menu options․ Use the SELECT button to cycle through the menu until you find the “Factory Reset” or “Default Settings” option․
Confirm your choice to proceed with the reset․ The thermostat will power cycle and revert to its initial setup screen․ Be aware that this process will require you to re-establish the Wi-Fi connection and reconfigure all settings․ After resetting, follow the initial setup instructions to reconnect to your network and customize the thermostat to your preferences․
Finding the Model Number (WF Verification)
Verifying the “WF” designation in your Honeywell T6 Pro model number is crucial for ensuring Wi-Fi compatibility․ Not all T6 models support wireless connectivity; the “WF” suffix specifically indicates Wi-Fi capability․ Locating this information is the first step in troubleshooting Wi-Fi connection issues․
To find your model number, access the device information menu directly on the thermostat․ Navigate through the main menu options – typically found under “Menu” or “Settings” – and select “Device Info” or “About․” The model number will be displayed on the screen, often starting with “TH6220WF․”
Confirm that the model number includes “WF․” If it does not, your thermostat lacks built-in Wi-Fi functionality․ If the “WF” is present but you’re still experiencing connection problems, try removing the thermostat from the wall for a minute and reconnecting it, then attempt the Wi-Fi setup again․ This can sometimes refresh the connection and resolve minor glitches․