honeywell 3000 installation manual
Welcome to the Honeywell 3000 Installation Manual. This guide provides a comprehensive overview of the system, ensuring proper setup and operation. Designed for system engineers and technicians, it covers installation, configuration, and troubleshooting steps to ensure seamless functionality and optimal performance.
1.1 Overview of the Honeywell 3000 System
The Honeywell 3000 System is a cutting-edge security and automation platform designed for residential and commercial applications. It integrates advanced features like biometric authentication, motion detection, and smart device control. With a user-friendly interface, it offers real-time monitoring and customizable alerts. The system supports seamless integration with third-party devices, enhancing functionality. Its modular design allows scalability, catering to diverse security needs. Engineered for reliability and performance, the Honeywell 3000 ensures robust protection and efficiency, making it a versatile solution for modern security requirements.
1.2 Importance of Proper Installation
Proper installation of the Honeywell 3000 System is crucial for ensuring optimal performance, reliability, and security. Incorrect installation can lead to system malfunctions, security vulnerabilities, and connectivity issues. It may also result in non-compliance with regulatory standards, potentially causing legal repercussions. Correct setup ensures all components function as intended, providing robust protection and minimizing false alarms. Proper installation also guarantees compliance with safety and operational standards, protecting users and property effectively. Additionally, it simplifies future maintenance and updates, ensuring long-term system efficiency and reliability. Adhering to installation guidelines is essential for maximizing the system’s capabilities and user satisfaction.

System Requirements
The Honeywell 3000 System requires specific hardware and software specifications to ensure optimal performance and compatibility. Meeting these requirements guarantees seamless functionality and avoids potential operational issues.
2.1 Hardware Requirements
The Honeywell 3000 System requires a compatible CPU, minimum 4GB RAM, and 500GB storage. Ensure the system operates within a temperature range of 15°C to 30°C and humidity below 60%. A stable power supply with a backup option is recommended. Verify that all mounting hardware and cables meet specifications. Use high-quality, shielded Ethernet cables for network connections to minimize interference. Ensure all peripherals, such as sensors and interfaces, are compatible with the system. Refer to the manual for detailed hardware specifications to guarantee proper installation and functionality.
2.2 Software Compatibility
The Honeywell 3000 System requires compatible software to ensure optimal performance. It supports Windows 10 or Linux-based operating systems, with specific firmware versions outlined in the manual. Ensure all software tools and utilities are updated to the latest versions. Verify compatibility with integrated devices and network protocols. Avoid using third-party software that may cause conflicts. For seamless operation, install only Honeywell-approved drivers and applications. Regularly check for updates to maintain system performance and security. Refer to the official Honeywell documentation for detailed software requirements and compatibility lists.

Pre-Installation Checklist
Ensure the site is prepared, tools are available, and all system components are accounted for. Verify compatibility with existing infrastructure and confirm all prerequisites are met before proceeding.
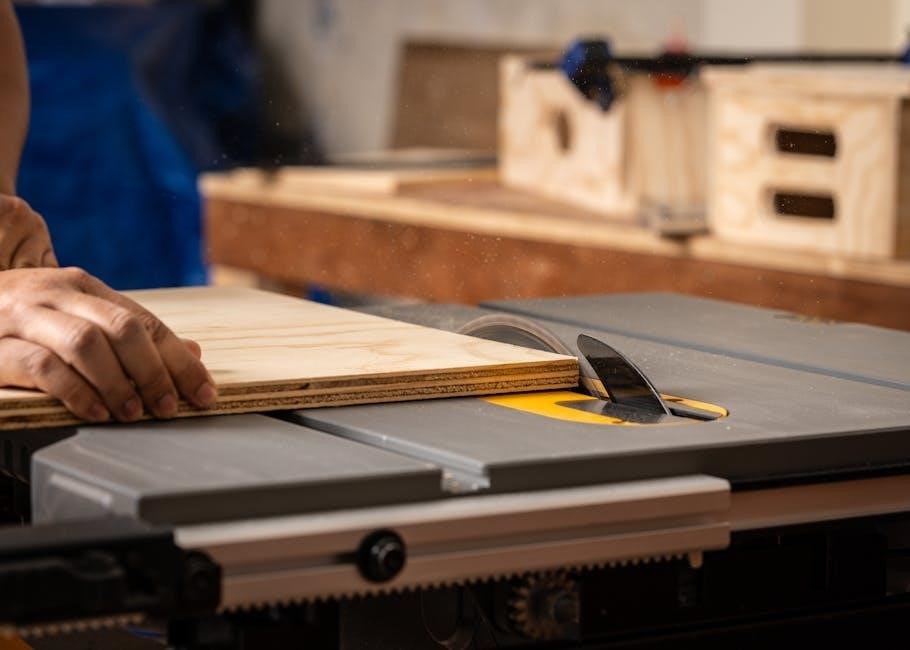
3.1 Tools and Materials Needed
To ensure a smooth installation, gather essential tools: screwdrivers, pliers, wrenches, cable ties, and a multimeter. Additionally, prepare materials like mounting brackets, cables, and fasteners.
Protective gear such as gloves and safety glasses is recommended. Verify the system’s packaging includes all components before starting. Cross-reference the inventory list to confirm completeness.
3.2 Site Preparation
Ensure the installation site is clean, dry, and free from obstructions. Verify the area meets environmental specifications, including temperature and humidity requirements. Clear the workspace to accommodate system components and tools;
Check power supply availability and ensure proper grounding. Label cables and connections in advance for organized setup. Assign trained personnel to handle sensitive equipment and follow safety protocols throughout the preparation process.

Installation Steps
Follow a systematic approach to install the Honeywell 3000 system. Begin with unpacking and inventory, then proceed to mounting, wiring, and final configuration. Ensure each step is executed carefully to guarantee proper functionality and system integrity.
4.1 Unpacking and Inventory
Begin by carefully unpacking the Honeywell 3000 system components from their shipping containers. Conduct a thorough inventory to ensure all parts, accessories, and documentation are included. Verify the integrity of each item, checking for any visible damage or discrepancies. Organize the components in a clean, dry workspace to prevent loss or misplacement. Refer to the provided inventory list to confirm the presence of essential items such as control modules, wiring harnesses, mounting brackets, and installation guides. Address any shortages or damages immediately to avoid delays in the installation process.
4.2 Mounting the System
Mount the Honeywell 3000 system in a stable, secure location, ensuring proper ventilation and accessibility. Use the provided mounting hardware to attach the unit to a wall or rack, following the manufacturer’s specifications. Ensure the surface is level and sturdy to prevent any movement or instability. Anchoring the system correctly is critical for reliable operation and safety. Leave sufficient space around the unit for maintenance and airflow. Double-check all mounting screws and brackets to ensure they are tightly secured before proceeding to the next installation steps.
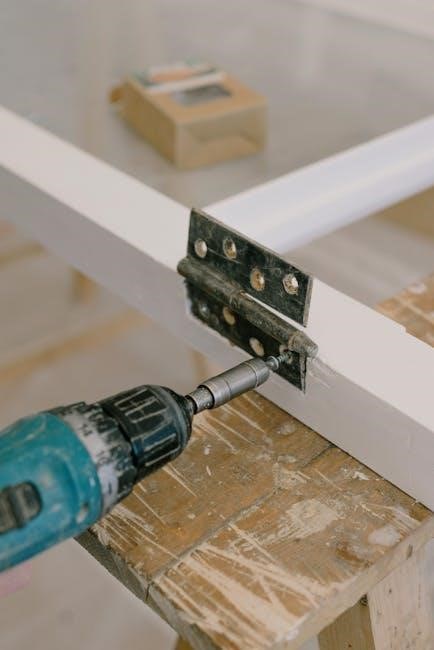
4.3 Connecting Wiring and Cables
Connect the wiring and cables carefully to ensure proper system functionality. Refer to the provided diagrams for correct port assignments and connections. Begin by attaching the power cable to the designated power port, ensuring a stable electrical supply. Next, connect data cables to the appropriate network ports, securing them firmly to avoid loose connections. Connect any additional I/O cables to their respective terminals, following the system’s wiring diagram. Use cable ties to organize and secure all wires, preventing tangles and wear; Finally, test each connection to ensure integrity and functionality before proceeding to the next step.
Configuration
Configuration is a critical step in setting up the Honeywell 3000 system. It involves setting up network parameters, integrating with other devices, and ensuring seamless communication. Proper configuration ensures security, efficiency, and optimal performance. Follow the manual’s instructions to navigate these steps successfully.
5.1 Setting Up Network Parameters
Setting up network parameters for the Honeywell 3000 system involves configuring static IP addresses, subnet masks, and default gateways to ensure proper communication. Start by accessing the system’s web-based interface using the default IP address. Navigate to the network configuration section and input the static IP address, subnet mask, and default gateway as recommended by the manual. Save these settings and restart the system to apply changes. Test the connection by pinging the device to confirm communication. Additionally, enable firewall settings and consider configuring DNS for domain name access. Document all settings for future reference and troubleshooting.
5.2 Integrating with Other Devices
Integrating the Honeywell 3000 system with other devices ensures seamless communication and enhanced functionality. Start by identifying compatible devices, such as sensors, actuators, or third-party systems. Use communication protocols like BACnet or Modbus to establish connections. Configure the system by assigning unique device IDs and defining data exchange parameters. Ensure proper wiring and IP addressing for networked devices. Test integration by sending and receiving signals to verify functionality. Troubleshoot by checking connections, configurations, and protocol compatibility. Document all integrated devices for future reference and system maintenance. This step ensures the Honeywell 3000 operates as part of a cohesive, interconnected system.

Testing and Validation
Testing and validation ensure the Honeywell 3000 system operates correctly after installation. Run diagnostic tests to verify hardware and software functionality. Check system performance, response times, and accuracy. Ensure all features work as intended, and validate integration with connected devices. Use test scenarios to simulate real-world conditions and confirm reliability. Address any issues identified during testing to guarantee optimal system operation and user satisfaction.
6.1 Running Diagnostic Tests
Running diagnostic tests is crucial to ensure the Honeywell 3000 system functions as intended. Initiate the diagnostic process through the system’s software interface or control panel. The tests will automatically check critical components, such as sensors, communication modules, and power supplies. Review the test results to identify any issues. Pay attention to error codes or warnings, which indicate specific problems. If all tests pass, the system is ready for operation. If issues arise, refer to the troubleshooting section for resolution. Ensure all components are operational before proceeding to the next steps.
6.2 Verifying System Performance
After completing the installation, verify the Honeywell 3000 system’s performance to ensure it meets operational standards. Compare baseline performance metrics with the system’s specifications. Monitor real-time data, such as response times, accuracy, and communication reliability. Check for consistent operation across all integrated devices. If performance aligns with expectations, the system is ready for full deployment. Any discrepancies should be addressed by reviewing diagnostic results or consulting troubleshooting guides; This step ensures the system functions optimally and reliably, delivering the intended results for your specific application.
Troubleshooting Common Issues
Troubleshooting common issues ensures optimal Honeywell 3000 performance. This section guides identifying and resolving problems efficiently, using diagnostic tools and resources for system reliability and minimal downtime.
7.1 Identifying Error Codes
Identifying error codes is crucial for diagnosing issues in the Honeywell 3000 system. Error codes provide specific information about system malfunctions, enabling targeted troubleshooting. Refer to the user manual or online database for code definitions. Codes are typically categorized by severity, such as critical, warning, or informational. Use the system’s diagnostic interface or consult technical support for accurate interpretations. Documenting error codes helps track recurring issues and ensures efficient resolution. Proper identification is the first step toward restoring system functionality and preventing future downtime.
7.2 Resolving Connectivity Problems
Connectivity issues with the Honeywell 3000 system can arise from network misconfigurations, faulty wiring, or interference. Begin by verifying all physical connections, ensuring cables are securely attached and free from damage. Check network settings, such as IP addresses and subnet masks, to confirm they match the system’s configuration. Restarting the system and related devices can often resolve temporary glitches. If issues persist, review event logs for error messages and consult the system’s documentation or technical support for guidance. Addressing connectivity problems promptly ensures uninterrupted system operation and data integrity.
Maintenance and Upkeep
Regular maintenance ensures the Honeywell 3000 system operates efficiently and reliably. Schedule routine checks, clean components, and update firmware to prevent issues and extend system lifespan.
8.1 Scheduled Maintenance Tasks
Perform daily, weekly, and monthly checks to ensure optimal system performance. Daily tasks include monitoring system status and logs. Weekly, clean dust from vents and verify cable connections. Monthly, inspect power supplies and backup systems. Additionally, review sensor calibrations and update maintenance records. Always follow the manufacturer’s guidelines for replacement of filters and worn components. Schedule annual professional inspections to address complex issues. Regular maintenance prevents unexpected downtime and ensures compliance with operational standards.
8.2 Updating Firmware and Software
Regular firmware and software updates are essential for maintaining system functionality and security. Ensure the Honeywell 3000 system is connected to the internet or download updates manually from the official Honeywell website. Always verify the authenticity of update files to prevent unauthorized access. Follow the step-by-step instructions provided in the update wizard. Backup configurations before proceeding to avoid data loss. After installation, restart the system and confirm that all features are operational. Visit the Honeywell support portal for detailed update guides tailored to your system version.

Compliance and Safety
Adhere to industry standards and regulations during installation. Ensure safety practices are followed to protect personnel and equipment. Proper handling and environmental considerations are critical for compliance and reliability.
9;1 Regulatory Compliance
Ensure the Honeywell 3000 system meets all applicable regulatory standards, including CE, UL, and FCC requirements. Compliance guarantees system integrity, performance, and adherence to local and international laws. Verify certifications for electrical and environmental safety. Installers must follow manufacturer guidelines to avoid non-compliance issues. Proper documentation and adherence to industry norms are essential for legal and operational integrity. Regular audits and updates ensure sustained compliance with evolving regulations.
9.2 Safety Precautions
Adhere to all safety guidelines when installing the Honeywell 3000 system to prevent accidents and ensure reliable operation. Always disconnect power sources before handling internal components to avoid electrical shocks. Use appropriate tools and wear protective gear, such as gloves and safety goggles. Proper grounding techniques are essential to prevent damage from static electricity. Follow the manufacturer’s instructions meticulously to avoid overheating or mechanical stress. Additionally, ensure the installation area is well-ventilated and free from flammable materials. Ignoring safety precautions can lead to personal injury, system damage, or non-compliance with safety regulations.
This concludes the Honeywell 3000 Installation Manual. Follow the steps to ensure optimal performance and reliability. Refer to this guide for future maintenance and updates.
10.1 Recap of Key Installation Steps
The Honeywell 3000 installation involves several critical steps to ensure proper functionality. Begin with unpacking and inventorying all components. Mount the system securely, ensuring stability. Connect wiring and cables carefully, following the provided diagrams. Configure network parameters and integrate with compatible devices. Run diagnostic tests to verify system performance and address any issues promptly. Regular maintenance and updates are essential for long-term reliability. Always adhere to safety guidelines and regulatory standards. By following these steps, you can achieve a seamless and efficient installation, optimizing the Honeywell 3000 system for peak performance.
- Unpack and inventory components.
- Mount the system securely.
- Connect wiring and cables properly;
- Configure network and device integration.
- Test and validate system functionality.
10.2 Final Tips for Optimal Performance
To ensure the Honeywell 3000 system operates at its best, perform regular software updates and maintenance checks. Keep the system in a clean, dry environment to prevent hardware damage. Properly manage cables to avoid interference and ensure reliable connections. Monitor system health through diagnostic tools and address issues promptly. Always follow safety guidelines during maintenance. Train personnel on system operation to maximize efficiency. By adhering to these practices, you can extend the system’s lifespan and maintain peak performance. Refer to this manual for troubleshooting common issues and optimizing functionality.
- Perform regular software updates.
- Maintain a clean and dry environment.
- Monitor system health regularly.
- Follow safety guidelines during maintenance.
- Train personnel for efficient operation.