
built right pool heater manual
Welcome to the Built Right Pool Heater manual! This guide provides essential information for installing‚ operating‚ and maintaining your pool heater efficiently. Designed for energy efficiency and durability‚ this heater ensures consistent pool temperatures while minimizing energy consumption. Follow this manual carefully to optimize performance and safety.
1.1 Overview of the Built Right Pool Heater
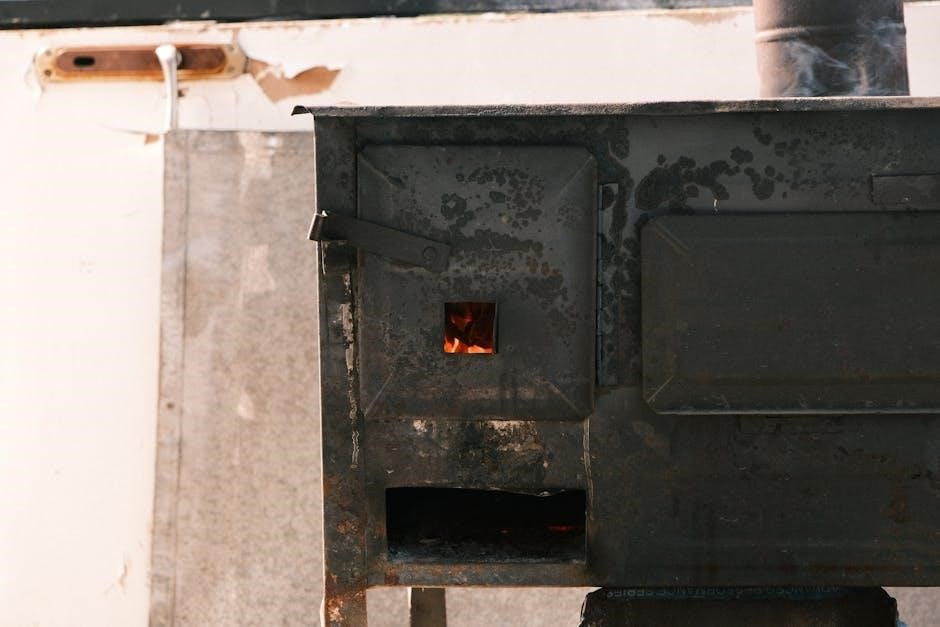
The Built Right Pool Heater is a high-performance‚ energy-efficient solution designed to maintain consistent pool temperatures. Engineered with cutting-edge technology‚ it ensures reliable heating while minimizing energy consumption. Ideal for various pool sizes‚ this heater is built to withstand harsh weather conditions and provide long-lasting durability. Its compact design makes it easy to integrate into any pool setup without compromising aesthetics. The Built Right Pool Heater is designed to be user-friendly‚ offering intuitive controls and advanced features for optimal performance. Whether for residential or commercial use‚ this heater delivers consistent warmth‚ extending the swimming season and enhancing your pool experience. With its robust construction and innovative design‚ it’s a reliable choice for pool owners seeking efficiency and reliability.
1.2 Key Features of the Built Right Pool Heater
The Built Right Pool Heater boasts an array of innovative features designed to enhance performance and user experience. Its advanced heat pump technology ensures energy efficiency‚ while the durable‚ rust-resistant exterior withstands harsh outdoor conditions. The digital control panel offers precise temperature adjustments and a smart timer for convenient scheduling. Additional features include a high-efficiency heating coil‚ eco-friendly design‚ and built-in thermal protection to prevent overheating; The heater’s compact size allows for easy installation in limited spaces‚ and its quiet operation minimizes noise disruption. Safety features such as automatic shut-off and child-safe controls provide peace of mind. Compatible with both saltwater and chlorine pools‚ this heater is versatile and adaptable to various pool configurations. These features collectively ensure optimal heating‚ energy savings‚ and long-term reliability.
1.3 Benefits of Using the Built Right Pool Heater
Using the Built Right Pool Heater offers numerous advantages‚ making it a top choice for pool owners seeking efficiency and reliability. Its energy-efficient design significantly reduces utility bills while maintaining consistent water temperatures. The durable construction ensures a long lifespan‚ minimizing replacement costs. The heater’s user-friendly interface and smart features simplify operation‚ allowing for precise temperature control and scheduling. Enhanced safety features provide peace of mind‚ while its eco-friendly operation aligns with environmentally conscious practices. Additionally‚ the heater’s compatibility with various pool types‚ including saltwater and chlorine systems‚ makes it versatile for different setups. By combining energy savings‚ durability‚ and ease of use‚ the Built Right Pool Heater enhances your swimming experience while reducing long-term maintenance and operational costs.

Safety Precautions and Warnings
Ensure safe operation by following all guidelines. Avoid electrical components with wet hands and keep the area clear of flammable materials. Proper ventilation is essential to prevent gas buildup.
2.1 General Safety Guidelines
Always read this manual thoroughly before using your Built Right Pool Heater. The heater is designed for outdoor use only and must be installed by a qualified professional. Ensure the area around the heater is clear of flammable materials and keep children and pets away. Never operate the heater if it is damaged or malfunctioning. Avoid touching electrical components with wet hands or while standing in water. Proper ventilation is essential to prevent gas buildup. Do not use the heater near open flames or sparks. Regularly inspect the unit for signs of wear or damage. Failure to follow these guidelines may result in injury‚ property damage‚ or void the warranty. Always adhere to local safety codes and regulations when operating the Built Right Pool Heater.
2.2 Installation Safety Warnings
Installation of the Built Right Pool Heater must only be performed by a licensed and qualified technician. Ensure the power supply is disconnected before starting any installation work. Never attempt to install the heater near open flames‚ sparks‚ or in areas where flammable vapors may be present. Keep the installation area well-ventilated to avoid gas buildup. Do not install the heater in enclosed spaces or areas prone to flooding. Always follow the manufacturer’s instructions for grounding and electrical connections to prevent shock or fire hazards. Improper installation can lead to serious safety risks‚ including gas leaks or electrical malfunctions. Ensure all local building codes and safety regulations are strictly followed. Failure to comply may result in injury‚ property damage‚ or void the warranty. Always prioritize safety when handling electrical and gas components during installation.
2.3 Operating Safety Warnings
Always follow proper safety precautions when operating the Built Right Pool Heater. Ensure the heater is supervised during operation‚ especially in the presence of children or pets. Never adjust temperature settings beyond the recommended range‚ as this may cause overheating or damage. Maintain proper chemical levels in the pool water‚ as imbalanced levels can damage the heater or pose health risks. Regularly inspect the heater and its components for signs of wear or damage. Do not operate the heater if any parts are damaged or malfunctioning. Keep flammable materials away from the heater at all times. Avoid touching electrical components or the heater itself while wet‚ as this can cause electrical shock. Always follow the manufacturer’s guidelines for safe operation and refer to this manual if unsure about any procedure.

Installation Requirements
Ensure proper installation by following specific guidelines for location‚ electrical connections‚ and plumbing. Use appropriate tools and materials‚ and consider hiring a qualified professional for safe and accurate setup.
3.1 Location and Placement Guidelines
The Built Right Pool Heater must be installed in a well-ventilated‚ outdoor location‚ at least 10 feet away from the pool to ensure safety and proper airflow. Choose a flat‚ stable surface that is heat-resistant and protected from direct weather exposure. Avoid placing the heater on grass or soft surfaces‚ as this can lead to instability. Ensure the unit is positioned near a reliable electrical power source and water supply line for convenient connections. The area should also have proper drainage to prevent water accumulation. Keep the heater away from flammable materials and ensure it is level for optimal performance. Maintain a minimum clearance of 3 feet on all sides and 4 feet above the unit for ventilation. Always follow local building codes and regulations during installation.
3.2 Electrical Installation Requirements
The Built Right Pool Heater requires a dedicated 240-volt electrical circuit with a minimum of 40-60 amps‚ depending on the model. Ensure the circuit is properly grounded and protected by a GFCI (Ground Fault Circuit Interrupter) for safety. The electrical supply must match the specifications outlined in the manual. Use appropriately sized wiring to avoid overheating; consult local electrical codes for sizing requirements. The heater should be connected by a licensed electrician to ensure compliance with safety standards. Do not use extension cords or temporary wiring solutions. A circuit breaker rated for the heater’s amperage must be installed. Always verify the electrical connections are secure and leak-free before operation. Failure to meet these requirements may result in electrical hazards or system malfunction. Ensure all connections are tested after installation to guarantee safe and efficient performance.
3.3 Plumbing and Piping Requirements
The Built Right Pool Heater requires proper plumbing and piping to ensure efficient operation. Use high-quality‚ corrosion-resistant pipes‚ such as PVC or CPVC‚ with sizes matching the heater’s inlet and outlet ports (typically 1.5″ or 2″). Ensure all connections are secure and watertight using appropriate pipe fittings and sealants. The system must be designed to handle the maximum water flow rate specified in the manual. Install a check valve to prevent backflow and ensure proper water pressure. The water supply line should be equipped with a shut-off valve for maintenance purposes. Avoid sharp bends or kinks in the piping‚ as they can restrict flow. Proper venting is essential to prevent airlocks. Drain the system during winterization to avoid freezing damage. Always follow local plumbing codes and consider consulting a licensed plumber for installation. Ensure all connections are leak-tested before operation.
Operating the Built Right Pool Heater
Turn on the power supply and ensure all settings are correct. Set your desired temperature and let the heater run. Monitor performance and adjust settings as needed for optimal results.
4.1 Starting Up the Heater for the First Time
Before starting your Built Right Pool Heater‚ ensure all connections are secure and the power source is properly configured. Turn on the power supply and allow the system to initialize. Do not skip any steps in the startup process‚ as this may cause damage or affect performance. Once powered on‚ the heater will automatically run a diagnostic check. Follow the control panel instructions to set your desired temperature and operating mode. Allow the system to run for at least 30 minutes to ensure proper circulation and heating. Monitor the temperature and adjust settings as necessary. Always refer to the user manual for specific startup instructions tailored to your model. Proper initialization ensures safe and efficient operation.
4.2 Adjusting Temperature Settings
Adjusting the temperature on your Built Right Pool Heater is straightforward. Locate the control panel and press the “Mode” button to select the desired operating mode. Use the “+” or “-” buttons to increase or decrease the temperature setting. The digital display will show the current temperature‚ allowing you to set your preferred level precisely. Ensure the temperature is within the recommended range to avoid excessive energy consumption or potential damage. Once your desired temperature is set‚ press “Save” to confirm. The heater will automatically adjust to maintain the selected temperature. Regularly monitor and adjust the settings based on weather conditions or personal preference to optimize comfort and efficiency. Always refer to the control panel instructions for specific guidance on temperature adjustment features.
4.3 Understanding the Timer and Scheduling
The Built Right Pool Heater features an advanced timer and scheduling system‚ allowing you to customize when the heater operates. To set the timer‚ press the “Timer” button on the control panel and use the navigation arrows to select the desired start and end times. You can program daily or weekly schedules to suit your pool usage. For energy efficiency‚ consider setting the heater to run during off-peak hours or when the pool is most frequently used. The timer ensures the heater only operates when needed‚ reducing energy waste. Once programmed‚ the heater will automatically turn on and off according to your schedule. Regularly review and adjust the timer settings to align with changing weather conditions or usage patterns. This feature helps maintain consistent pool temperatures while optimizing energy consumption.

Maintenance and Upkeep
Regular maintenance ensures your Built Right Pool Heater performs optimally. Routine checks‚ cleaning‚ and winterization are essential to prevent issues and extend the heater’s lifespan. Follow guidelines carefully.
5.1 Routine Maintenance Checks
Regular maintenance is crucial to ensure your Built Right Pool Heater operates efficiently and lasts longer. Start by inspecting the power supply and connections to ensure they are secure and undamaged. Check for any signs of leaks in the plumbing and connections‚ and ensure all valves are functioning correctly. Clean or replace the filter as needed to maintain proper water flow and heating efficiency. Inspect the electrical components and wiring for any damage or wear. Verify that the thermostat and temperature sensors are working accurately. Check the heat exchanger for corrosion or blockages and clean it if necessary. Ensure proper airflow around the unit by clearing debris from the surrounding area. Monitor the heater’s performance and adjust settings as needed. Keep a maintenance log to track inspections and repairs. Regular checks help prevent issues and ensure reliable operation.
5.2 Cleaning the Heater and Its Components
Regular cleaning of the Built Right Pool Heater and its components is essential for maintaining efficiency and prolonging its lifespan. Start by turning off the power supply to the heater before beginning any cleaning tasks. Use a soft cloth and mild detergent to wipe down the exterior‚ removing dirt‚ dust‚ or algae buildup. Clean the filter according to the manufacturer’s instructions‚ as a dirty filter can reduce heating performance. Inspect and clean the heat exchanger tubes‚ ensuring they are free from debris or corrosion. Use a brush or soft sponge to clean the burner area and combustion chamber. Check the water inlet and outlet for blockages and clean them if necessary. Avoid using harsh chemicals or abrasive materials that could damage the components. After cleaning‚ allow the unit to dry completely before restarting it. Regular cleaning ensures optimal performance and prevents potential issues.
5.3 Winterizing the Heater
Winterizing your Built Right Pool Heater is crucial to protect it from freezing temperatures and ensure optimal performance when you restart it in the spring. Begin by turning off the power supply and allowing the heater to cool completely. Drain all water from the heater‚ pipes‚ and connections to prevent freezing damage. Disconnect and store any hoses or accessories. Insulate exposed pipes and fittings to safeguard against cold snaps. Cover the heater with a durable‚ weather-resistant cover to shield it from snow and ice. Follow the manufacturer’s instructions for any specific winterization steps. Regularly inspect the heater during winter to ensure no damage occurs. Proper winterization extends the lifespan of your pool heater and ensures it operates efficiently when the weather warms up again. Always prioritize safety and consult a professional if unsure about any step.

Troubleshooting Common Issues
This section helps identify and resolve common problems with your Built Right Pool Heater. From error codes to operational issues‚ find solutions to keep your heater running smoothly and efficiently.
6.1 Common Problems and Solutions
Experiencing issues with your Built Right Pool Heater? This section outlines common problems and their solutions to help you resolve them quickly.
- Heater not turning on: Check the power supply‚ circuit breaker‚ and thermostat settings. Ensure the timer is correctly scheduled and the system is properly primed.
- Inadequate heating: Verify temperature settings‚ water flow‚ and gas supply (if applicable). Clean the filter and ensure proper venting for optimal performance.
- Unusual noise: Check for loose connections‚ debris in the fan‚ or worn-out parts. Turn off the heater and contact a professional if the issue persists.
Regular maintenance and prompt troubleshooting can prevent minor issues from becoming major problems‚ ensuring your pool stays warm and comfortable year-round.
6.2 Error Codes and Their Meanings
Your Built Right Pool Heater is equipped with an error code system to help identify and resolve issues quickly. Below are the most common error codes and their meanings:
- E01: No ignition detected. Check the gas supply‚ igniter‚ and ensure proper airflow.
- E02: Temperature sensor malfunction. Inspect the sensor for damage or blockages and replace if necessary.
- E03: Low water flow detected. Ensure proper water circulation and check for blockages in the plumbing.
- E04: Communication error between components. Restart the system or check wiring connections;
- E05: Overheating detected. Check for obstructions in vents and ensure proper water flow.
Refer to your manual or contact customer support for further assistance if issues persist.
6.3 When to Call a Professional
If you encounter issues beyond basic troubleshooting‚ it’s important to seek professional assistance. Call a certified technician if you notice persistent error codes‚ unusual noises‚ or leaks‚ as these may indicate serious malfunctions. Additionally‚ if the heater fails to heat the pool or turns off unexpectedly‚ professional diagnosis is recommended.
- For complex electrical or gas-related issues‚ always contact a licensed technician to ensure safety and compliance with local regulations.
- If error codes like E04 (communication error) or E05 (overheating) persist after troubleshooting‚ professional intervention is necessary.
- Schedule annual maintenance with a qualified professional to ensure optimal performance and extend the heater’s lifespan.
Remember‚ improper repairs can void the warranty or pose safety risks. Always use certified professionals familiar with the Built Right Pool Heater.
Congratulations on completing the Built Right Pool Heater manual! This guide has provided essential insights for efficient‚ safe‚ and optimal pool heating. Enjoy your perfectly heated pool experience!
7.1 Summary of Key Points
This manual has provided comprehensive guidance on the Built Right Pool Heater‚ covering installation‚ operation‚ and maintenance. Key features like energy efficiency‚ durability‚ and advanced temperature control were highlighted. Safety precautions‚ such as proper installation and operating guidelines‚ were emphasized to ensure a secure experience. Troubleshooting tips and regular maintenance routines were also detailed to maintain optimal performance. By following this guide‚ users can enjoy a safe‚ efficient‚ and enjoyable pool heating experience. Always refer back to this manual for specific instructions and best practices.
7.2 Final Tips for Optimal Performance
To ensure your Built Right Pool Heater operates at its best‚ always follow the maintenance schedule and perform routine checks. Regularly clean the filter and inspect pipes for leaks or damage. Adjust temperature settings wisely to balance comfort and energy savings. Use the timer function to avoid unnecessary heating when the pool is not in use. Keep the surrounding area clear of debris to maintain airflow and prevent overheating. Monitor energy consumption and adjust habits to maximize efficiency. Stay informed about updates or recalls by registering your product with the manufacturer. By adhering to these tips‚ you’ll enjoy consistent performance‚ lower utility bills‚ and extended heater lifespan. Remember‚ proper care and attention will keep your pool heater running smoothly for years to come.

Additional Resources
For further assistance‚ refer to our additional resources‚ including manufacturer contact information‚ online support‚ and recommended accessories‚ to enhance your pool heater experience and ensure optimal performance.
8.1 Manufacturer Contact Information
For any inquiries or support‚ contact Built Right directly at 1-800-POOL-HEAT (1-800-766-5438). Their customer service team is available Monday–Friday‚ 8 AM–6 PM EST. Visit their official website at www.builtright;com for more details. Email inquiries can be sent to support@builtright.com. For physical correspondence‚ mail to Built Right Pool Heaters‚ 123 PoolCare Drive‚ Orlando‚ FL 32821. The website also features downloadable manuals‚ FAQs‚ and troubleshooting guides. Ensure to have your product serial number ready for faster assistance. This section provides direct pathways to manufacturer support‚ ensuring timely resolution of any questions or issues you may have.
8.2 Online Support and Manuals
Visit the official Built Right website at www.builtright.com/support for comprehensive online resources. Here‚ you’ll find downloadable PDF manuals‚ installation guides‚ and user instructions tailored to your pool heater model. Additionally‚ explore troubleshooting guides‚ FAQs‚ and video tutorials to address common concerns. The website is updated regularly to ensure you have access to the latest information and software updates for your heater. For technical assistance‚ submit a support ticket through the website or use the live chat feature during business hours. This section is designed to empower you with the knowledge and tools needed to maintain and optimize your pool heater’s performance. Take advantage of these resources to resolve issues and maximize your product experience.
8.3 Recommended Accessories
To enhance your pool heater experience‚ consider these recommended accessories:
- A digital pool thermometer for precise temperature monitoring.
- A pool cover to retain heat and reduce energy costs.
- A pool timer for automated heating schedules.
- PVC pipes and fittings for durable plumbing connections.
- A filter cleaner to maintain optimal water flow.
These accessories are designed to work seamlessly with your Built Right Pool Heater‚ ensuring maximum efficiency and longevity. Always purchase accessories from authorized dealers to guarantee compatibility and quality. By investing in these items‚ you can further enhance your pool experience and protect your investment. Regularly check the manufacturer’s website for updated accessory recommendations tailored to your specific model.